Extending Order Detail
CoreShop's Order Detail Page is a custom-designed interface built with ExtJs, offering straightforward ways to extend and customize it according to your specific needs.
UI Overview
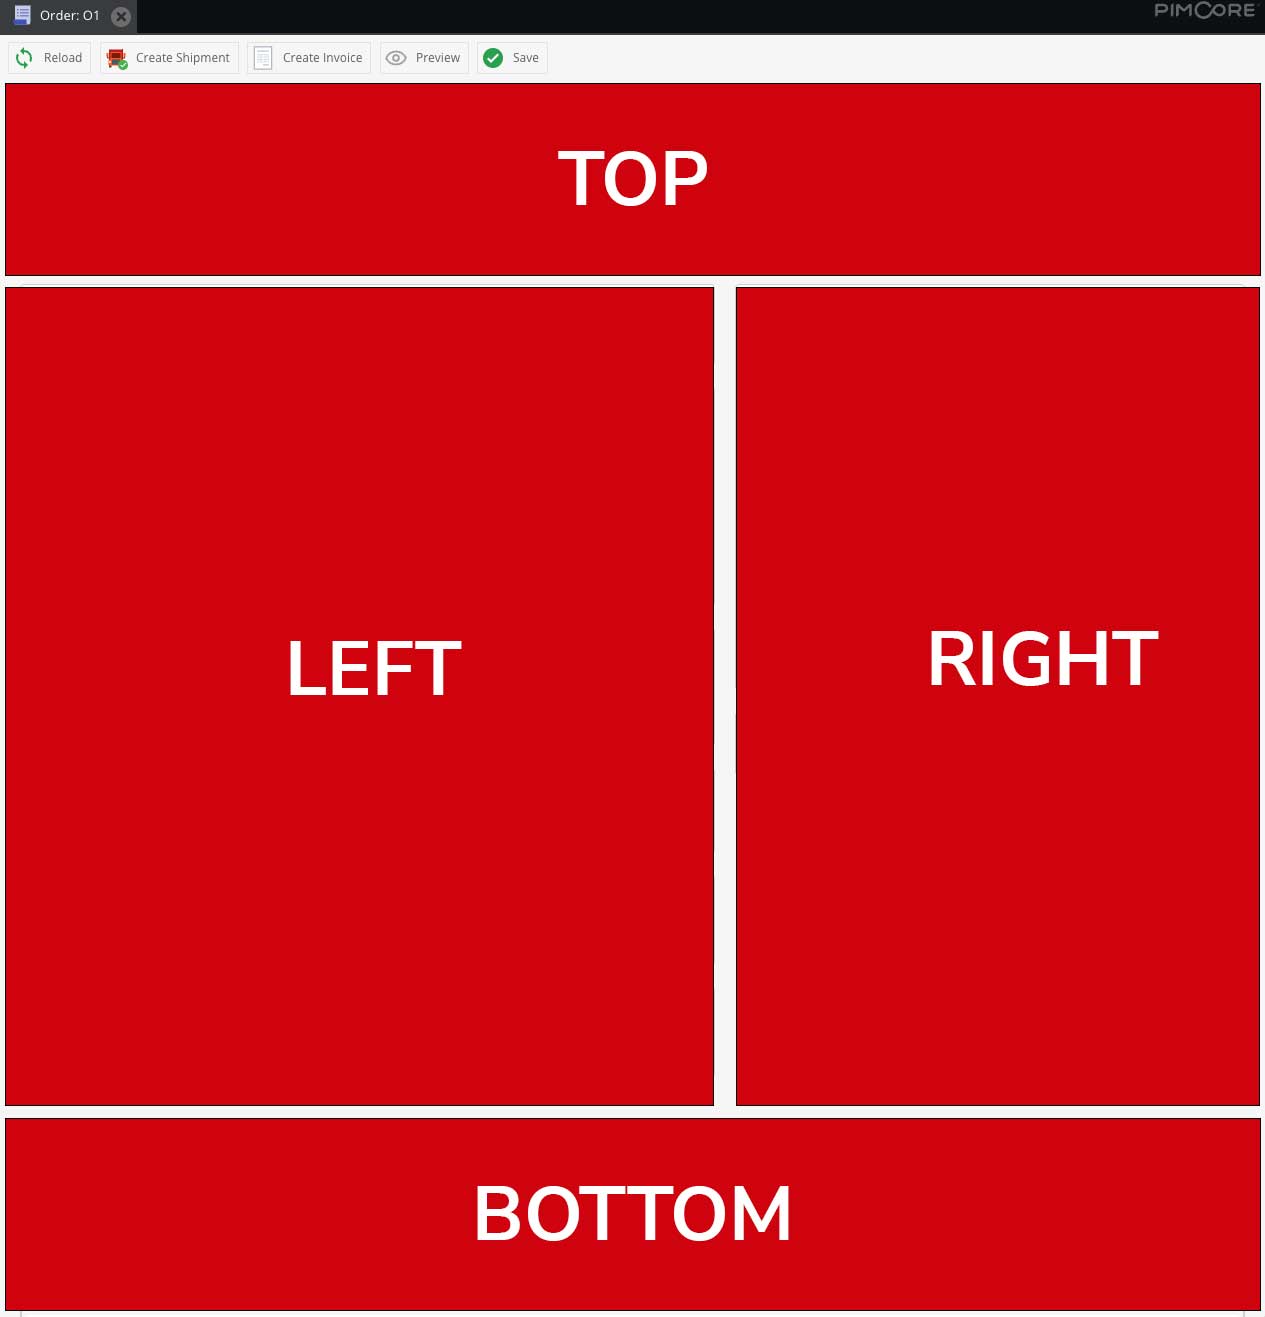
The Order Detail UI consists of various blocks strategically positioned for optimal user experience. There are four main positions for these blocks:
- Top: At the top of the page.
- Left: On the left side of the page.
- Right: On the right side of the page.
- Bottom: At the bottom of the page.
Default Blocks
The following are the default blocks provided by CoreShop:
- Top
- Header
- Left
- Payments
- Invoices
- Shipments
- Correspondence
- Right
- Customer Details
- Comments
- Bottom
- Details
Creating a New Block
To introduce a new block, you'll need to create a new Pimcore Backend Javascript File, following the
namespace coreshop.order.order.detail.blocks.
Example
Below is a sample JavaScript code to demonstrate how to add a custom block:
pimcore.registerNS('coreshop.order.order.detail.blocks.custom');
coreshop.order.order.detail.blocks.custom = Class.create(coreshop.order.order.detail.abstractBlock, {
    saleInfo: null,

    initBlock: function () {
        var me = this;

        me.deliveryPhone = Ext.create({
            xtype: 'panel',
            style: 'display:block'
        });

        me.purchaseOrderNumber = Ext.create({
            xtype: 'panel',
            style: 'display:block'
        });

        me.trackingMail = Ext.create({
            xtype: 'panel',
            style: 'display:block'
        });

        me.packagingType = Ext.create({
            xtype: 'panel',
            style: 'display:block'
        });

        me.packagingAmount = Ext.create({
            xtype: 'panel',
            style: 'display:block'
        });

        var items = [];

        items.push({
            xtype: 'panel',
            layout: 'hbox',
            items: [
                {
                    xtype: 'panel',
                    flex: 1,
                    items: [
                        me.purchaseOrderNumber,
                        me.deliveryPhone,
                        me.trackingMail
                    ]
                },
                {
                    xtype: 'panel',
                    flex: 1,
                    items: [
                        me.packagingType,
                        me.packagingAmount
                    ]
                }
            ]
        });

        this.details = Ext.create('Ext.panel.Panel', {
            title: t('zeroridge_order_informations'),
            margin: '0 20 20 0',
            border: true,
            flex: 6,
            iconCls: 'coreshop_icon_order',
            items: items
        });
    },

    getPriority: function () {
        return 1;
    },

    getPosition: function () {
        return 'left';
    },

    getPanel: function () {
        return this.details;
    },

    updateSale: function () {
        var me = this;

        me.deliveryPhone.setHtml('<span style="font-weight:bold;">' + t('zeroridge_delivery_phone') + ': </span>' + me.sale.deliveryPhone);
        me.purchaseOrderNumber.setHtml('<span style="font-weight:bold;">' + t('zeroridge_purchase_order_number') + ': </span>' + me.sale.purchaseOrderNumber);
        me.trackingMail.setHtml('<span style="font-weight:bold;">' + t('zeroridge_tracking_mail') + ': </span>' + me.sale.trackingEmail);

        if (me.sale.packagingType) {
            me.packagingType.setHtml('<span style="font-weight:bold;">' + t('zeroridge_packaging_type') + ': </span>' + me.sale.packagingType.localizedfields.data.en.name);
        } else {
            me.packagingType.setHtml('<span style="font-weight:bold;">' + t('zeroridge_packaging_type') + ': </span> Unknown');
        }

        me.packagingAmount.setHtml('<span style="font-weight:bold;">' + t('zeroridge_packaging_amount') + ': </span>' + me.sale.packagingAmount);
    }
});
In this custom block, the following methods must be implemented:
- initBlock: Initializes the block upon creation.
- getPriority: Determines the display priority of the block. Higher values mean higher placement.
- getPosition: Specifies the position of the block (top, left, right, or bottom).
- getPanel: Returns the ExtJs Panel representing the content of the block.
- updateSale: Updates the block's content when the sale is refreshed
Customizing Order Serialization
CoreShop uses JMS Serializer for order serialization. You can extend its serialization logic either through JMS
Configuration or by registering an event handler for the CoreShop\Bundle\OrderBundle\Events::SALE_DETAIL_PREPARE
event.
If that isn't enough, you can create a Custom Controller and query that with Ext.Ajax and your own parameters.